How to Fix A Corrupt or Missing Opencl.dll Error in 2023
by William Sanders
Getting an error that opencl.dll can’t be found or is corrupt can be annoying. It not only disturbs your workflow but it also wastes your time.
Contents
- Why a Need to Fix a Corrupt or Missing Opencl.dll Error in 2023?
- Analysis about Missing or Corrupt Opencl.dll file on Windows 10
- List of Best Ways to Fix A Corrupt or Missing Opencl.dll Error in 2023
- Carry Out Deployment Image Servicing and Management (DISM)
- Repair the Opencl.dll File That Has Gone Bad with the SFCFix Tool
- Remove the Bad Opencl.dll File From Your System
- Update Your Graphics Card Driver
- Copy the Important Files
- Get the New OpenCL Runtime Package
- Disable the Graphics Card on Your Windows 10 PC
- Run SFC and DISM Scans
- Install the Latest Updates
- Perform a Startup or Automatic Repair
- Windows 10 Needs to be Reinstalled
- Conclusion of How to Fix A Corrupt or Missing Opencl.dll Error in 2023
Why a Need to Fix a Corrupt or Missing Opencl.dll Error in 2023?
It is important to fix any bad files on your Windows 10 PC once you find them. Opencl.dll errors are no exception. Like any other problem with your PC, it requires immediate attention to prevent the malfunction from worsening. You may wonder how the Opencl.dll error comes about. It happens when one does not handle system updates well. The error when not taken care of, can cause some of your apps to crash.
Updating your Windows Operating System could be a hassle at times. You have to make sure that the applications on your PC are compatible with the new environment in which they must work. It is important to make sure that the core files and applications are working well with the operating system. If that is not the case, it could be that the drivers are outdated. Outdated drivers may not work with the updated Operating System. This causes a host of problems from then on. Some of the issues are missing programs and drivers that have become corrupted.
Are you contemplating updating your Windows PC to the most recent one, there are few things you should consider. There is a risk of having the Opencl.dll error. This fault can disturb the functionality of the whole system. The NVIDIA drivers could also be affected. Another important thing that could be involved are the graphic drivers. The graphic drivers can cause the Opencl.dll to become corrupted. The way it happens is that the graphics drivers are able to annul the Opencl.dll that is available with its own. The recent file will in turn corrupt the old Opencl.dll.
Analysis about Missing or Corrupt Opencl.dll file on Windows 10

Having errors on Opencl.dll, whether you can’t find it at all or it is corrupt could pose a lot of problems for you. It is more like your computer has to recover from the shock of dealing with the error. Before then, your PC will show a blue screen. As if that is not enough, it can also stop suddenly when working on some apps that are affected.
Dealing with a missing or corrupt Opencl.dll can affect the performance of your computer to a large extent. Apart from the signs we have mentioned above, the computer can restart without you making the command. This can be annoying especially if you are in the middle of something that is important. The point is that because of this error, your PC will become unstable. This way any other malfunction can come as a result.
We know that having a corrupt file can cause the Opencl.dll error. Another thing that can cause it is using outdated drivers. No one like using things that are outdated so why should your PC? When these drivers start acting up and don’t work with the operating system the system will crash overall. Missing programs and bad drivers are a manifestation.
To know for sure that the missing programs and bad files are the cause of the errors you are getting you can opt for a SFC scan. By doing this you get a sense of the files that are corrupted in the system. Note that SFC only checks to see if there are bad files but it does not repair or replace them. There are a lot of ways that one can go about repairing or replacing the corrupted files. We have mentioned some of them below.
List of Best Ways to Fix A Corrupt or Missing Opencl.dll Error in 2023
There is no way to know the particular files that are corrupted without scanning them first. Doing a scan is the first step to solving the problem. After the scan is complete and successful you now know which files are bad. With this information you can then use the different methods we have to fix them.
Carry Out Deployment Image Servicing and Management (DISM)
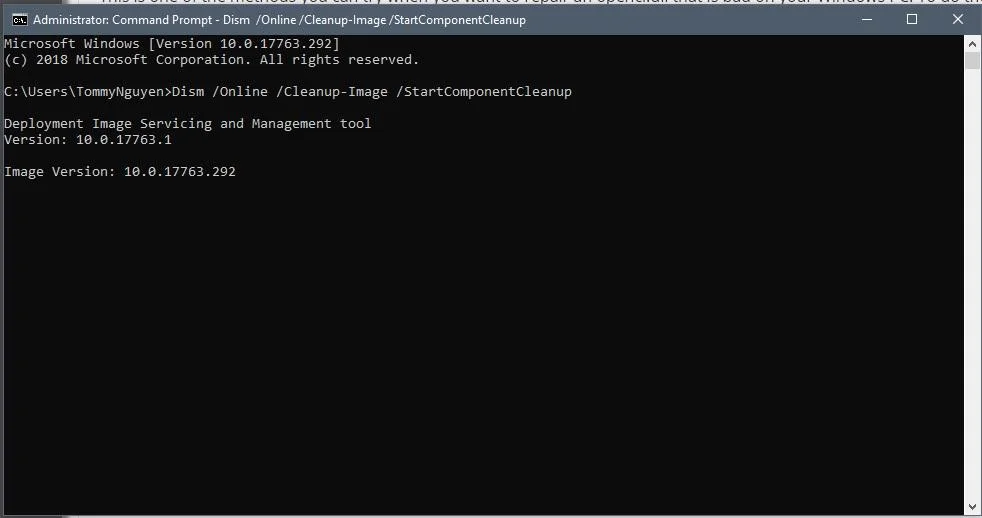
This is one of the methods you can try when you want to repair an opencl.dll that is bad on your Windows PC. To do the DISM there are a few steps that you need to follow. These steps are:
1. The first thing you should do is press both the Windows and X buttons on your keyboard.
2. From the options that you are given, select the Command Prompt (Admin) option.
3. Now you have to type in the commands that are written below in the command prompt window. Feel free to copy and paste. We would too if we were in your shoes. After each command press enter.
Dism /Online /Cleanup-Image /StartComponentCleanup
Dism /Online /Cleanup-Image /RestoreHealth
4. If that does not work you can also try the following commands
Dism /Image:C:\offline /Cleanup-Image /RestoreHealth /Source:c:\test\mount\windows
Dism /Online /Cleanup-Image /RestoreHealth /Source:c:\test\mount\windows /LimitAccess
Take note of the location of the Recovery Disk. This is so that you can type in the right thing.
5. Rather than using the SFC or scan now command you have the opportunity to use the DISM command. Type in the following command and press enter.
Dism /Online /Cleanup-Image /CheckHealth
6. You should restart your Windows PC. This enables the changes to be saved.
7. If you are still experiencing the same problem, you can make use of techbench ISO to fix the bad Opencl.dll file.
8. After you have done that, the next step is to make a folder on the desktop of your Windows PC with name mount.
9. There is a file from the ISO that was downloaded. It is called the install.win file. You need to copy it to the mount folder that was created on your desktop.
10. The next step is to visit the command prompt window again to type in the following command.
Dism /mount-wim /wimFile:%USERPROFILE%\Desktop\install.wim /index:1 /MountDir:%USERPROFILE%\Desktop\mount
Dism /Online /Cleanup-Image /CheckHealth
Dism /Online /Cleanup-Image /RestoreHealth /Source:%USERPROFILE%\Desktop\mount\windows /LimitAccess
Dism /unmount-wim /Mountdir:%USERPROFILE%\Desktop\mount /discard
11. Lastly, try to restart your computer to see if the bad Opencl.dll file has been repaired.
Repair the Opencl.dll File That Has Gone Bad with the SFCFix Tool
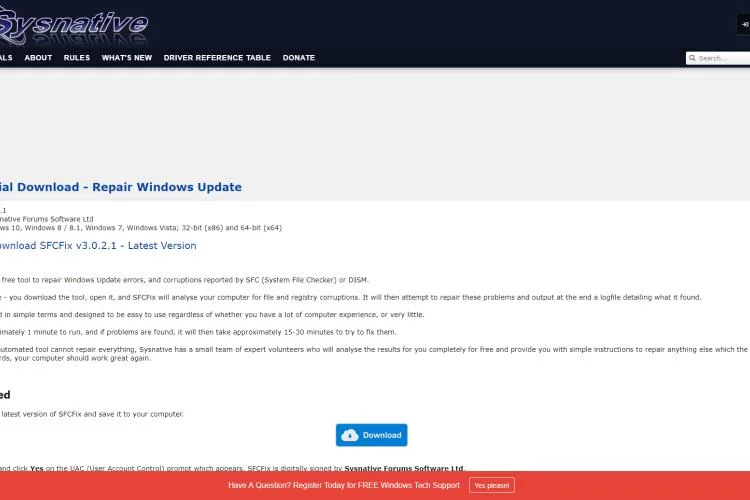
This is a very promising method of repairing Opencl.dll files that have been corrupted. It could easily be the best way to do it. How it does it is that it scans the system for corrupted files. After the system has been scanned and the corrupted files identified, it then goes ahead to repair them. How convenient! There are some steps that you should take to use this method.They are:
1. Don’t have SFCFix yet? You should download it from the official website first.
2. If you don’t have SFCFix yet, you can download it first on the official site.
3. The next thing to do would be press both the Windows and X buttons on your keyboard.
4. From the options that you are given, select the Command Prompt (Admin) option.
5. This is the time to type in the “SFC/SCANNOW” command on the command prompt window. After typing in the command, press enter.
6. When the SFC scan starts you can then launch the SFCFix.exe file.
7. Check at the end of the whole process to see if the Opencl.dll file has been repaired.
Remove the Bad Opencl.dll File From Your System
Removing the corrupt file from your system is a no brainer. If something is bad for your system the best thing is to remove it asap. Use the following steps to remove the file
1. Go to the C:\Windows\WinSxS location on your Windows PC’s computer drive.
2. Be sure that the SFC command is run first. This is done to see if the Opencl.dll is actually corrupted. Sometimes it may not be.
3. When you are in the WinSxS folder go on to look for the Opencl.dll file.
4. Now search for the particular file you want.
“Wow64_microsoft-windows-r..xwddmdriver-wow64……”.
5. The next step is to copy the file you found to an external drive. It could be a hard drive, USB or even SD card, it doesn’t matter.
6. Go back and find where the bad Opencl.dll is in your system.
7. Next you press two buttons at the same time. The buttons are the Windows and X on your keyboard.
8. Pick the “Command Prompt (Admin)” option that pops up.
9. After that, you type in the command “takedown /f Path_And_File_Name”. Then press enter. Make use of the path that the file that was corrupted was located. The file name is also useful.
10. Now we know it has been a lot so far but hang on. You have to type in another command and of course press enter afterwards. The command is “icacls Path_And_File_Name /GRANT ADMINISTRATORS:F. Make use of the path that the file that was corrupted was located. The file name is also useful.
11. The next step is to type in the command “Copy Source_File Destination”. This is done to copy the file that you saved the external drive before to a folder in Windows. An example would be Copy F:\opencl.dll C:\Windows\WinSxS\wow64_microsoft-windows-r..xwddmdriver-wow64-c_31bf3856ad364e35_10.0.14393.0_none_de9cd86dc2ec8d58\opencl.dll
12. Now it is time for the easier part. Restart your personal computer. This is done to save the changes that were made.
13. Lastly, the Scan health command as to be ran from DISM. This is done to check if the file has been repaired. Hopefully you haven’t wasted your time and energy.
Update Your Graphics Card Driver
It is a known fact that issues with Opencl.dll have a relationship with the graphics card drivers of computers. Something you can try when your graphics card is not up to par is to try to update it to the most recent version. This should fix the issue. If not there are other options for you to try. Instead of finding an update on your own you can decide to check for the particular drivers that your Windows PC uses. After that, you should get the updated version from its manufacturer. If you do not want to go through all that stress you have the option of getting a good driver updater to do the work for you which is most likely a faster way of doing it.
When you visit the website of the manufacturer, be sure that you find the latest version that is available. Always make sure that the version you want to update is a good match for your system or else there is no use. Download the update and then install it. Keep your fingers crossed and check if the Opencl.dll issue has been resolved.
Copy the Important Files
A way to savage the corrupt files situation is to copy the important files before they too become corrupted. A lot of times, files suddenly go missing because of system updates. To do this you do not have to be tech savvy or know anything about writing codes. All you need is the basic knowledge on how to copy and paste.
For you to use this method successfully you should have the missing files copied to the C:WindowsSystem32 directory. In the same way, you should copy the version of the file that is 64 bits. This time to a different directory called the C:WindowsSysWOW64 directory.
It is always advisable to back up the files. This is to make sure that you are not at a loss if things go south because anything can happen. When you discard the old files you can then get the new ones registered. There are some steps you need to follow to do this.
1. The first thing you should do is press both the X and Windows button together and at the same time.
2. Pick the “PowerShell (Admin)” or the “Command Prompt (Admin)” option
3. The next step is to type in the command “regsvr32 opencl.dll”. After that, press the enter key.
4. As soon as the command has been successfully run, the issue with the Opencl.dll should be sorted out.
Another way you can go about it is to look for the missing files in a folder called NVIDIA. When you find it, copy it to where you want it to be. Follow these steps to do it:
1. Go to C:Program FilesNVIDIA CorporationOpenCL.
2. There is a file called “OpenCL64.dll”, select it by right clicking.
3. From the options that are displayed pick “Copy”
4. Go to C:WINDOWSSystem32 directory where you will be able to paste your file. Do not forget to change the file name to Opencl.dll.
Get the New OpenCL Runtime Package
After you have scanned the whole system and have found out that the Opencl.dll file is still missing or has not been repaired. The next thing you can try to do is download a new Opencl.dll runtime package. You can get the package from the official Intel website.
After the package has finished downloading, you need to have the installer ran. When the Opencl.dll package has been installed you can check if the faulty Opencl.dll file has been deleted from your Windows PC.
Disable the Graphics Card on Your Windows 10 PC
Like we have talked about before, Your PC’s graphics card can cause the Opencl.dll to become corrupt. Something you can do is to disable it. The reason why this is important is that it helps you know if the problem with the Opencl.dll remains after you have disabled it. If the problem is still there it means the fault is not from the graphics card so you can enable it.
The driver should not be disabled for long. Make sure it is only a temporary thing until you have acquired the most recent driver. If the latest graphics driver is not yet in your possession it is okay to use an integrated graphics card. Note that the integrated graphics card can only do simple jobs because it is not as stable as your original graphics card.
Run SFC and DISM Scans
This method is very effective to repair any corrupt Opencl.dll. To run SFC and DISM scans there are some steps you need to follow. They are:
1. The first step is to insert an image. The image you need to put in is the Windows 10 ISO
2. As the administrator open up the Command Prompt.
3. The next step is to type in the command
Dism /Online /Cleanup-Image /RestoreHealth /Source:esd:F:sourcesinstall.esd1WindowsWinSxSwow64_microsoft-windows-r..xwddmdriver-wow64-c_31bf3856ad364e35_10.0.10586.0_none_3dae054b56911c22sfc /scannow
4. Wait a bit for the command to finish doing its thing. After that, check if the issue with your Opencl.dll has been resolved.
Install the Latest Updates
Similar to a lot of errors that occur with Windows, the failed Opencl.dll could be a result of bugs that are in the system. If the problem comes from old drivers that have developed faults, the simple solution would be to update them. When your Windows PC is up to date you have the chance to get the best benefits plus the performance will be optimal.
Though the Windows 10 PCs are programed to automatically install updates. It is still a machine that is predisposed to human error from factory making. It is not perfect and it sometimes can miss some things. If you wish to check for the recent updates that are available to you follow these steps
1. Head on to the settings by pressing the Windows and I buttons at the same time.
2. Click on the “Update & Security” section.
3. Go on to select the “Check for updates” option.
4. In few seconds Windows will start searching for the most recent updates that are available.
5. When the recent updates are found, they will be downloaded automatically..
6. Now it is time to wait for everything to download. Make sure that you have a solid internet connection to do this.
7. Be sure that all the recent updates are installed.
8. Finally reboot your Windows PC to compete the process of installation. Check if the issue with your Opencl.dll is resolved.
Perform a Startup or Automatic Repair
When you have tried a lot of things to fix the Opencl.dll problem and it didn’t work, you can try this method. A startup or Automatic Repair is in line. Follow these steps to go on with it:
1. You need to put in the Windows 10 installation drive or disc that is bootable.
2. Secondly, you should reboot your PC.
3. You would be asked to press whatever key you want to keep booting from the installation disc.
4. Do what you are asked. Press a key.
5. Pick the language you want to use. After that, click next
6. When you see the“Repair your computer” option click on it. It should be at the left side of the bottom part of your screen.
7. From the options presented pick “Troubleshoot”.
8. The next option to pick is “Advanced option”.
9. Now click on “Startup Repair”.or “Automatic Repair”.
10. At this time, the Startup or Automatic repair would have started
11. Wait for the process to finish.
12. The last step is to restart your PC. Check if the issue with the Opencl.dll is solved.
Windows 10 Needs to be Reinstalled
If you have tried everything else and it hasn’t worked, you can try to reinstall the Windows operating system all over again. If you have any important files, it is advisable to store them in an external drive before you go on. You can also decide to store them on an online cloud storage. Whichever one works best for you is okay. With the Windows OS reinstalled all missing or corrupt files should be replaced and working fine.
Conclusion of How to Fix A Corrupt or Missing Opencl.dll Error in 2023
Corrupt files in your computer will really affect the performance. A faulty Opencl.dll is no exception. With all the suggested solutions we have given we believe that one of them will solve the issue for you.
 |
 |
 |
 |
|
|
|
|

About William Sanders
William Sanders was born and raised in California. After receiving his Master’s degree in information science from San Diego State University, he started working as a city councilor. In his spare time, William enjoys playing best-selling MMORPG games such as World of Warcraft and Fnal Fantasy, where he often takes on the role of guild leader with hundreds of players collaborating for success under his leadership. William is also a regular contributor to some popular magazines such as San Jose Mercury News, Gleanster Research, and Palmgear.
Leave a Reply
Just Gears and Gadgets
You can get FREE Gifts. Or latest Free phones here.
Disable Ad block to reveal all the info. Once done, hit a button below
|
|
|
|